This is one of those simple but incredibly delicious dishes that taste like they could be from a restaurant. You know those kind? They’re kind of ridiculously easy and only have a few simple ingredients, but they come together into gorgeous, soul-satisfying dishes.

This one is definitely good enough for company, but it’s easy enough that I could make it as a complete cooking novice in college. I don’t know where the original recipe comes from, but I’ve kind of adapted it along the way anyway, so basically it’s my own creation.

What makes it so great is all of the grape tomatoes. Fresh, bright, and consistently flavorful, grape tomatoes are my go-to tomato of choice when I don’t have tomatoes growing in my garden (which is most of the year). I’m lucky enough to have a bit of an overwhelming bounty of grape tomatoes (and regular tomatoes, for that matter) coming in from my back yard at the moment, so I’ve been searching for recipes to use them up. This old standby of mine came to mind right away.

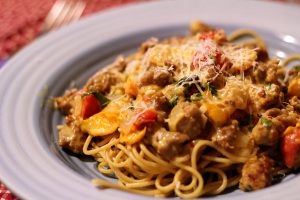
I used a good amount of those lovely yellow grape tomatoes, which is why the sauce in the photos is the color it is (it kind of blends in with the color of the pasta)- if you use all red tomatoes, the sauce will be pinkish.

It’s so easy – cook up some sweet Italian sausage, onion and garlic, slice a whole bunch of grape tomatoes in half and throw them in the pot, cook it down, and finish with some cream and basil. Easy peasy. And oh so yummy. One note – I used whole wheat spaghetti this time, which is fine, but because it’s such a chunky sauce, it really works best with a shorter pasta like farfalle, rotini, or gemelli.

Creamy Pasta with Grape Tomatoes and Sausage

From: unknown/me!

1 pound sweet Italian sausage, casings removed

1 medium onion, chopped

4 cloves of garlic, minced

1/4 teaspoon red pepper flakes

2 pints grape tomatoes, halved (I used a mix of red and yellow grape tomatoes

1/4 cup heavy cream

1/4 cup freshly grated parmesan cheese, plus more for serving

1/2 cup chopped fresh basil

Coarse salt and freshly ground pepper

1 pound pasta (short pasta works best)

1. In a large, deep skillet over medium heat, cook sausage and red pepper flakes. Sauté about 5 minutes, breaking up the sausage into small pieces, until the sausage is no longer pink. Add the onion and garlic and cook a few minutes more, until the onion is soft.

2. Add the grape tomatoes, season with salt and pepper, and cook, stirring occasionally, until the tomatoes are collapsed and very saucy, 5 – 10 minutes. Add cream and parmesan and simmer 5 minutes more. Stir in basil.

3. Meanwhile, cook pasta in well-salted water according to package directions. Drain and serve pasta with the sauce and more parmesan cheese.

On Fridays, my husband can come home for lunch (he works 15 minutes away), so I like to make a hot meal to give him some variety from his regular cold sandwiches. He never knows what he’ll come home to – sometimes it’s a tuna melt, sometimes it’s a stew, sometimes it’s soup. Today, it was curried lentils in tomato sauce over brown rice.

I’m on a avoid-sugar-and-white-flour kick right now, and I’m trying to stay away from bread altogether.  I’ve found that cutting bread from my diet makes lunchtime tricky, so I’ve been sifting through the healthy vegetarian recipes on MarthaStewart.com searching for easy, interesting dishes that would work well for lunch – and that’s where I found this.

Granted, eating a super healthy lunch may take a bit more planning than slapping together my beloved peanut butter and jelly sandwich, but it is rewarding. Tucking into this bowl of hearty, flavorful and nutritious lentils was pretty great. It’s spicy and delicious, with just the right amount of kick. It’s very filling, and it’s loaded with good-for-you nutrients like folate, potassium and iron. Lentils are also a good source of fiber and protein. A meal that’s both incredibly healthy and incredibly delicious?  I don’t want to brag, but there were some high fives after lunch.

Curried Lentils in Tomato Sauce

Adapted slightly from Martha Stewart Everyday Food, March 2007

  • 2 cups dried lentils, rinsed and picked over*
  • 3 tablespoons vegetable oil
  • 1 medium onion, finely chopped
  • 1 piece fresh ginger (2 inches long), peeled and finely grated (my piece was big and fat so there was a lot of ginger)
  • Coarse salt
  • 2 teaspoons curry powder
  • 1 teaspoon garam masala (optional – I used it)
  • 1/4 to 1/2 teaspoon cayenne pepper
  • 1 jar (26 ounces) best-quality store-bought tomato sauce (I used Prego Chunky Garden Combo)
  • 2 tablespoons fresh lime juice (from 1 lime)
  • 1/2 cup chopped fresh cilantro, plus more for garnish (optional)
  • Cooked brown rice, for serving
  1. In a medium pot, combine lentils with 2 cups of water. Bring to a boil over high heat, then reduce to a simmer and cover. Cook for 20 – 30 minutes, topping off water as needed. Lentils are done when easily mashed with a fork.
  2. In a large saucepan, heat oil over medium. Add onion and ginger; season with salt. Cook, stirring frequently, until beginning to brown, 5 to 8 minutes.
  3. Add spices; cook, stirring, until fragrant, 30 to 60 seconds.
  4. Add tomato sauce, lentils, and 1 cup water. Simmer until slightly thickened, 5 to 10 minutes. Test lentils – if they are still a bit gritty as mine were, add another half cup of water and continue to simmer for 10 minutes. When the lentils are ready, stir in lime juice and cilantro; season with salt.

*The original recipe called for 2 cans of lentils, rinsed and drained.

I made these tasty morsels for a friend who’s in the hospital. Hospital food is just dreadful and it’s unfortunate that hospitals don’t seem to make the connection between nutritious food and healing. This guy is recovering from a major illness and they’re serving him super-processed, unappetizing, vegetables from a can, white rice, corn syrup-laced food that he can barely choke down. Isn’t that horrible? So he made a request for visitors to bring him healthy dinners. When I first visited (with a serving of autumn harvest chili in tow), one thing that stood out in my conversation with him was that breakfasts at the hospital are terrible, too. You’d think breakfast would be relatively easy to do well, but they’re not – horrible pancakes with disgusting maple-flavored corn syrup, cold cereals with minimal whole grain but plenty of sugar, that sort of thing. And one can only take so many days of oatmeal.

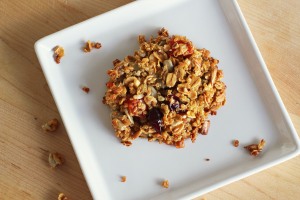
So I looked in my Power Foods cookbook for something nutritious and wholesome that would work for breakfast and that would keep well at room temperature for a few days. These fit the bill perfectly – they’re full of whole grains in the form of oats and quinoa, plus nuts, seeds, and dried fruit, and lightly sweetened with honey.

They’re tasty, chewy, nutty (the quinoa, oats and sunflower seeds are all toasted in the oven to give them all a nice nutty flavor), and above all nutritious. I hope my friend enjoyed these, I’ve been loving the leftovers! These make a great snack, too, and would be a perfect addition to a lunch box. I’ve been enjoying them crumbled over plain nonfat Greek yogurt for lunch.

Quinoa Granola Clusters

Adapted from Martha Stewart’s Power Foods

1 1/2 cups water

3/4 cups white quinoa, rinsed and drained

1 1/2 cups old fashioned rolled oats

1/2 cups raw cashews (or other nut), coarsely chopped

1 cup dried fruit, coarsely chopped (I used dried apricot, mango, and cranberries)

1/2 cup raw sunflower seeds

1/4 cup flax seeds (I used Trader Joe’s Golden Roasted Flax Seeds)

1/4 cup sugar

1/2 teaspoon coarse salt

1/4 cup honey

2 tablespoons neutral-tasting oil, such as canola

1 1/2 teaspoons vanilla extract

2 large eggs plus 1 large egg white, lightly beaten

Vegetable oil cooking spray

  1. Preheat oven to 350 degrees. Bring the water to a boil in a small saucepan. Add quinoa; return to a boil. Stir once; cover, and reduce heat to a simmer. Cook until quinoa is slightly underdone (it will finish cooking in the oven) and has absorbed most of the liquid, about 12 minutes. Using a slotted spoon, transfer quinoa to a rimmed baking sheet. Bake, fluffing with a for occasionally, until pale golden, 30 to 35 minutes. Transfer to a large bowl and let cool.
  2. Spread oats evenly on the baking sheet. Bake, stirring occasionally, until lightly browned, about 15 minutes. Add oats to bowl with quinoa. Spread sunflower seeds on baking sheet;  bake, stirring occasionally, until lightly toasted, about 7 minutes. Add to quinoa mixture; let cool. Reduce oven temperature to 300 degrees.
  3. Toss nuts, fruit, sugar and salt in with quinoa mixture. Mix honey, oil, vanilla and eggs together; stir into quinoa mixture.
  4. Line an unrimmed baking sheet with parchment paper; lightly coat with cooking spray. Place 1/4 cup mixture onto sheet for each cluster, spacing them 3 inches apart. Flatten to 1/4-inch thick. Bake, rotating sheet halfway through, until crisp, about 25 minutes. Let cool on baking sheet for a couple of minutes, then transfer to a wire rack to cool completely. Store in an airtight container for up to one week.


There is something so charmingly retro about this recipe, which is what drew me to it in the first place. Pressing cooked quinoa into a pie plate and then unmolding it onto a platter so the neat circles of butternut squash are attractively displayed on top seems like such a weird thing to do to quinoa. It’s something that they would’ve done in the 1960’s when American cuisine was all about Spam and pineapple upside down cakes. If my husband had been around when I stumbled across this recipe, he probably would’ve been hesitant to try it when my first reaction was “This looks so weird – I have to make it!”

But I’m not one to let a quirky 1960’s vibe dissuade me from trying out a recipe. So I made it as a side dish for dinner one night, and after we both marveled at this odd way of serving quinoa, we tried it. Holy cow, it’s good! It’s actually really tasty! I know the pie shape has nothing to do with the flavor, but it did cause some doubt. Well, I’m here to tell you that you don’t need to worry, I’ve tested it out, and this is a really yummy dish. It’s great as a side dish, but it would also work really well as a light lunch with a little side salad. It’s so healthy, all whole grains and veggies, it’s an easy way to slip some wholesome goodness into your meal.

Quinoa Pie with Butternut Squash

From Martha Stewart Living, November 2006

1 tablespoon extra-virgin olive oil

1 butternut squash (about 1 1/2 pounds), peeled, havled crosswise, and seeded

18 fresh sage leaves, plus 1 teaspoon finely chopped sage

1/2 onion, cut into 1/4-inch dice (about 3/4 cup)

1 garlic clove, minced

1 cup quinoa

2 cups homemade or low-sodium store-bought vegetable stock

1 1/2 ounces Parmesan cheese, finely grated

1 teaspoon coarse salt

1/8 teaspoon freshly ground pepper

Vegetable oil, cooking spray

  1. Preheat oven to 375 degrees. Brush 2 rimmed baking sheets with 1 teaspoon oil. Cut five 1/4-inch-thick rings of squash; cut remainder into 1/4-inch dice. Place squash on sheets. Toss with 1 teaspoon oil; sprinkle with 12 sage leaves. Bake until tender and just golden, 15 to 20 minutes. Let cool completely. Keep oven on.
  2. Heat remaining teaspoon oil in a medium saucepan over medium heat. Add onion and garlic. Cook, stirring, until translucent, 3 to 5 minutes. quinoa and stock; bring to a boil. Cover; reduce heat. Simmer until liquid has been absorbed, about 15 minutes. Remove from heat. Let stand, covered, 2 minutes.
  3. Stir together quinoa, diced squash, chopped sage, Parmesan, salt, and pepper in a medium bowl.
  4. Coat a 9-inch glass pie plate with cooking spray. Arrange 6 sage leaves face down in plate; top with squash rings. Press quinoa mixture on top.
  5. Bake 20 minutes. Let cool 5 minutes, then invert onto a serving platter. Serve wedges warm or at room temperature.


Pinterest is my latest obsession, and the inspiration behind this cake. That website has so many amazing and creative ideas!  Like this sweet garland I made yesterday:


So pretty, and so simple! I cut strips of paper about an inch wide, folded them in half, then curled each end around a knitting needle to form the heart shape. Then I used a needle to string some thread through the middle of the bottom of each heart, and double-sided tape to stick the tops together, pinching the thread in between. The bottom hearts are made by taking a heart-shaped hole punch to Behr paint chip. The paint chip was a free sample and the paper was leftover from making our wedding invitations, so this cute decoration cost me nothing! Sweet! And that’s why I love pinterest.

Anyway, I was hunting around Pinterest for party ideas when I came across an image of a pink bundt cake, and it linked to a recipe for a pink lemonade bundt cake. Yum yum! But when I went back later to check out the recipe in more detail, I realized it involved cake mix – something I prefer to avoid. Not only do I not dig the texture of box mix cakes, I can’t get past the chemically aftertaste that box mixes have. So I was disappointed that I didn’t have a recipe for a pink lemonade bundt after all.

But I could not get the idea of a pink bundt cake out of my head. It just seemed so cute and fun and girly.

I needed a pink bundt cake!

So I went to Martha, of course, looking for the perfect lemony pound cake to turn pink, and of course she didn’t let me down. This recipe comes from her Fresh Flavor Fast cookbook, although that recipe uses two loaf pans instead of a bundt. So I whipped it up, and added a healthy dose of pink gel food coloring (and maybe went a teensy bit overboard) – and I had me a pink lemon poundcake. And I’m calling it a pink lemonade poundcake, even though there isn’t actually any lemonade per se involved in making the cake, because hey. Pink lemonade is just lemons and sugar and pink food coloring anyway, and this cake has all that. Without any nasty chemicals!

This cake is deliciously fresh and very lemony and bright. It’s a great cake for winter – the flavor just perks you up and brings sunshine into your cold, grey day. And of course, the food dye is completely optional after all, it would be a yellow cake without it. But a pink bundt cake would be great for Valentine’s Day. And I think it would be the cutest for a bridal shower or a baby shower for a baby girl. A bundt cake like this has a kind of classy, old fashioned feel to it that could be really charming at an afternoon tea-style shower.

Why am I thinking about baby and bridal showers, anyway? BLAME PINTEREST. So many cute ideas. I can’t help it.

Pink Lemonade Pound Cake

Adapted from Everyday Food Fresh Flavor Fast

Prep: 30 minutes Total time: 3 hours (with cooling)

1 cup (2 sticks) unsalted butter, at room temperature, plus more for pans

3 cups all purpose flour, plus more for pan

3/4 cup buttermilk

Finely grated zest of two lemons

1 cup lemon juice (from 5 to 6 lemons)

1 1/2 teaspoons salt

1/2 teaspoon baking powder

1/2 teaspoon baking soda

2 cups sugar

5 large eggs, room temperature

Pink food dye gel (I used Wilton icing colors in Rose)

Lemon glaze (recipe below)

1. Preheat oven to 350. Grease a flour a 10 cup bundt pan.

2. Combine buttermilk, lemon juice, and zest. In a bowl, whisk together flour, salt, baking powder and baking soda.

3. With an electric mixer on medium-high speed, cream butter and sugar until light and fluffy. Add eggs, one at a time, beating until incorporated after each addition. Scrape down bowl as needed.

4. Reduce speed to low. Add flour mixture in three additions, alternating with buttermilk and beginning and ending with flour. Add just a touch of food dye gel (a tiny bit goes a long way!) and beat until just combined.

5. Pour batter into prepared pan, and bake until a toothpick inserted in the center comes out clean, 50 – 60 minutes. Cool 15 minutes in pan, then turn out onto a rack to cool completely.

6. Transfer cake to a plate or cake stand and pour the glaze over the cake. Let set, about 30 minutes.

Lemon glaze

2 cups confectioner’s sugar

3 to 4 tablespoons fresh lemon juice

Pink food dye gel

Mix together sugar and lemon juice in a bowl. Add more sugar or lemon juice as necessary to make glaze thick yet pourable. Stir in a tiny bit of food dye gel to get the desired shade of pink.


I was just scrolling through old photos and I realized that I never shared this recipe with you. *Gasp* 

What. The heck. Is wrong with me.

We love, love, loved this cake. It was the perfect size for the two of us. There was enough that we were able to enjoy it for a while, but not so much that it went stale. Or was  so big that we snarfed it more quickly than was reasonable in order to prevent it from going stale. Not that that ever happens around here. *Ahem*

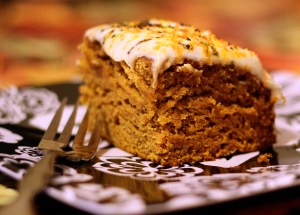
Anyway, this is a great little cake, packing a lot of delicious, complex flavors from a generous amount of pumpkin pie spice. It’s a moist cake with a nice tight crumb that is really the perfect texture for a homemade cake – I’m not a fan of the spongy airy texture that you find in most cake mix cakes. My husband went really crazy for it and said it was one of the best cakes he’d ever had. The honey frosting is the perfect complement to the pumpkin-y flavor of the cake. These are flavors that you’d typically find in fall baking, but I don’t see why this cake should be relegated to only a few months of the year – the warm, comforting flavors of this cake would be perfect on a cold, snowy winter’s night.

Pumpkin Spice Cake with Honey Frosting

Adapted slightly from Everyday Food, November 2005

For the cake

1/2 cup (1 stick) unsalted butter, melted, plus more for pan

2 1/2 cups all-purpose flour, (spooned and leveled)

2 teaspoons baking soda

1/2 teaspoon salt

1 tablespoon pumpkin-pie spice (or 1 1/2 teaspoons cinnamon, 3/4 teaspoon ginger, 1/2 teaspoon nutmeg, and 1/8 teaspoon each allspice and cloves)

2 large eggs

1 1/2 cups sugar

1 can (15 ounces) solid-pack pumpkin puree*

For the frosting

1/2 cup (1 stick) unsalted butter, very soft

1 bar (8 ounces) regular (or reduced-fat) cream cheese, very soft

1/4 cup honey

2 cups powdered sugar

1 tablespoon milk

  1. Preheat oven to 350 degrees. Butter a 9-inch square baking pan**. (Mine is 8×8 and worked just fine.)
  2. In a medium bowl, whisk flour, baking soda, salt, and pumpkin-pie spice. In a large bowl, mix eggs, sugar, butter, and pumpkin puree until combined. Add dry ingredients to pumpkin mixture, and mix gently until smooth.
  3. Turn batter into prepared pan, and smooth top. Bake until a toothpick inserted in center of cake comes out with just a few moist crumbs attached, 45 to 50 minutes. Cool cake 10 minutes in pan, then turn out of pan, and cool completely, right side up, on a rack.
  4. Make Honey Frosting: In the bowl of a stand mixer with the paddle attached, beat butter, cream cheese and honey until smooth. Slowly mix in powdered sugar. Add milk to thin if necessary, so that the frosting has a nice spreadable consistency.
  5. Spread top of cooled cake with honey frosting. Cut cake into squares to serve.

*Be sure to use canned pumpkin, not pumpkin pie filling. Using pureed fresh pumpkin is not recommended.

**You can also use a 9-by-5-inch loaf pan: Increase baking time by 25 to 30 minutes (tent loaf with foil if it browns too quickly).


We’re still trying to eat healthy around here, and have been pretty successful. I’ve been finding some awesome recipes that may be full of good veggies and low on calories, but definitely don’t skimp on flavor. These tostadas are the perfect example.

Okay, I’ll admit: I was a bit skeptical about this recipe. My husband was overtly wary of it, not being negative while I was making it but definitely lacking his usual enthusiasm for my cooking. I could tell: he thought I was crazy. I, on the other hand, and totally unbeknownst to my husband, was quietly, silently skeptical. C’mon, sweet potatoes? On tostadas? This isn’t going to be good. This is not going to go over well.  Why am I making this?

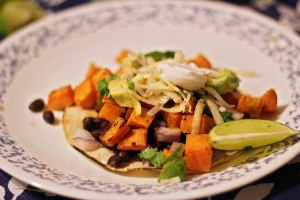
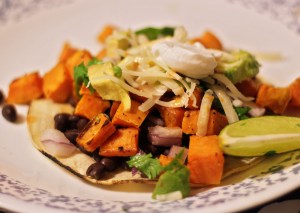
Turns out, I was making it because IT IS AWESOME. My intuition for recipes is pretty good, and when I first saw this pop up in my google reader, I had a sense it would be great (it was only when I was putting all of my dinner eggs in a sweet potato tostada basket that I began to doubt myself). And I was right!! (The first me, not the doubting me.) So, gentle readers, fear not: this recipe is super yummy. And super good for you!! We gobbled these up and I can’t wait to make them again.

Black Bean and Sweet Potato Tostadas

From Two Peas and Their Pod

2 large sweet potatoes, washed, peeled, and cut into small cubes
Drizzle of olive oil
Salt and pepper, to taste
4 corn tortillas
1 can black beans, rinsed and drained
1/2 red onion, diced
1/2 cup chopped cilantro
1 avocado, diced
1 lime, cut into wedges
Shredded cheese (optional)
Salsa or hot sauce (optional)

directions:

1. Preheat oven to 400 degrees F. Place sweet potato cubes on a large baking sheet. Lightly drizzle with olive oil and toss. Season with salt and pepper. Roast in the oven for 40-45 minutes or until sweet potatoes are soft and tender. Stir a couple of times while they are roasting.

2. In a non-stick skillet, heat corn tortillas over medium-high heat. When tortillas start to bubble up, flip and heat the other side until golden brown, about 30 seconds for each side. Place tortillas on a baking sheet and lightly spray with cooking spray. Place under a hot broiler for about 2 minutes. Remove from oven and turn over tortillas. Place tortillas back under the broiler for another two minutes.*

3. Heat black beans over the stove or in the microwave. Top tortillas with beans, sweet potatoes, onion, cilantro, lime juice, and any other toppings you desire. Serve warm.

*I heated my tortillas up by putting them directly on the burner over a medium flame, and flipping them with tongs. This is how I always heat up corn tortillas for tacos, and it’s very quick, but it did result in softer tortillas you’d get if you followed the recipe,so our tostadas were a bit floppy and we ended up eating them like great big tacos.

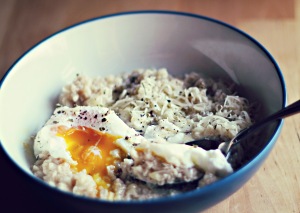
I know this sounds really strange. I never would have thought to put an egg on top of oatmeal before I saw the recipe in an issue of Everyday Food. Oatmeal toppings are things like brown sugar, raisins, cinnamon, nuts, maple syrup. An egg and cheese on oatmeal just sounded funky – oatmeal is supposed to be sweet, not savory! Right?

Well, I’m here to tell you that oatmeal totally works as a savory dish. A soft-cooked egg will make anything rich and delicious, so it makes sense that it would transform boring plain oatmeal into something irresistibly yummy. The cheese adds to the savory goodness. This is one of our favorite breakfast meals, and it’s super easy. Quick cooking oatmeal is ready in no time (you could use old fashioned oatmeal too, it will just take a bit longer), and the egg cooks up quickly too. Sometimes I poach the eggs and sometimes I fry them – both methods work well. And this meal is so hearty and filling and healthy – it’s really a perfect start to the day.

Savory Oatmeal and Egg Bowl

Adapted slightly from Everyday Food, October 2010

Serves 2

1 cup quick cooking oats

1 3/4 cup water

1/4 teaspoon table salt

2 eggs

4 tablespoons thinly grated sharp cheddar cheese (or fresh parmesan cheese), to taste

coarse salt and freshly ground pepper, to taste

dried herbs such as thyme, parsley or chives, if desired

1. Bring water and salt to a rolling boil. Add oats and reduce temperature to medium. Cook, stirring occasionally, for 1 minute. Cover and remove from heat. Let rest for 2-3 minutes or until eggs are ready.

2. Meanwhile, prepare eggs. Lightly fry in a pan for about 3 minutes until whites are set and yolks are still runny, or poach for 4 to 5  minutes. To poach eggs, fill a large frying pan almost full with water. Add a tablespoon of vinegar and a teaspoon of salt. Bring to a simmer, almost boiling. Crack eggs into two teacups and use the teacups to gently lower the eggs into the water. Cover and remove from heat, and allow to sit for 4 to 5 minutes.

3. Dish oatmeal into two bowls, top with grated cheese and herbs, if using. Place egg on top. Season with salt and pepper.


Happy New Year! Have you made any resolutions? I’m not the resolution-making type myself, but I do want to continue making good, healthy wholesome food and keep up my routine of working out regularly. After all the indulgence of Christmas week, I feel compelled to focus especially on eating well for the immediate future. I can’t stay away from pasta and cheese forever, but I’m going to be kicking up the healthiness around here for a while.

In that spirit, I bring you roasted chicken and vegetables. Back when I started cooking for myself, I always thought of roast chicken as something I’d have when I was visiting my parents, not something I’d make myself. “Roasted chicken is something mom makes, but it’s too much bother for me,” I’d think, which is kind of sad because roasted chicken is one of my favorite meals and I was avoiding it because I thought it was tricky, or too much work. Guess what? NOT TRUE. It’s actually very easy, worry free, and the results of course are delicious. And with a recipe like this one, also very healthy.

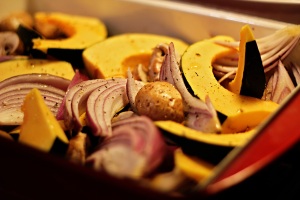
You chop up some veggies and toss them in a pan, then nestle the chicken breasts on top, so the majority of the meal is done in one pan. If you roast some potatoes along side the roasting pan, you’ve got dinner without much fuss. The veggies roast in the drippings from the chicken, which makes them taste divine. The chicken is bone in and skin on, so it cooks up moist and flavorful, and then you just peel off the skin to avoid the excess calories. We really enjoyed this meal, and it was so easy to throw together. There’s really no need to save roasted chicken for special occasions when you have this simple recipe in your arsenal, and it’s so so good and wholesome.

Roasted Chicken and Vegetables

From Everyday Food: Great Food Fast

Yield: Serves 4 Prep: 10 minutes Total time: 1 hour

1 acorn squash, halved lengthwise, seeded, and sliced 1/2-inch thick

1 pound cremini mushrooms, trimmed and halved

1 large red onion, cut into 1/2-inch wedges

8 garlic cloves, crushed

1 tablespoon olive oil

Coarse salt and freshly ground pepper

4 bone-in chicken breast halves (10 ounces each)

1 tablespoon dried rosemary, crumbled

  1. Preheat oven to 375 degrees. Combine the squash, mushrooms, onion, garlic, and oil in a roasting pan; season with salt and pepper, and toss to coat. Roast until the squash is beginning to soften and all the vegetables are heated through, about 15 minutes.
  2. Meanwhile, lift up the skin from the chicken breasts; rub the flesh with rosemary and some salt and pepper. Replace the skin; season the chicken all over with more salt.
  3. Remove the roasting pan from the oven, and place the chicken, skin side up, on top of the vegetables. Return to the oven; continue roasting until the chicken is cooked through and the vegetables are tender, about 35 minutes.

Merry Christmas! I hope everyone’s having a wonderful holiday.  I just wanted to quickly post one last Christmas cookie recipe before the cookie-baking festivities come to a close.

These sugar cookies are very different from the old fashioned sugar cookies that I usually make. The old fashioned ones are chewy, with a crunchy sugary crust and a delicate lemony flavor. These bad boys are cakey and soft and slightly tangy from the sour cream.

James was really excited when I made these cookies – he loves frosted sugar cookies from the grocery store, which are usually pretty gross with their vegetable shortening and long, chemically ingredient lists. These cookies are buttery and delicious. The recipe makes a ton so I froze a couple dozen unfrosted ones to have later.

Frosted Sugar Cookies

From Brown Eyed Baker

Yield: 5 to 6 dozen cookies

Prep Time: 25 minutes | Bake Time: 7 minutes

For the Cookies:
6 cups all-purpose flour
1 teaspoon baking soda
1 teaspoon baking powder
½ teaspoon salt
1 cup unsalted butter, at room temperature
2 cups granulated sugar
3 eggs
2 teaspoons vanilla extract
1½ cups sour cream

For the Buttercream Frosting:
1/2 cup unsalted butter, room temperature
1 teaspoon vanilla extract
4 cups powdered sugar
Pinch of salt
6 tablespoons milk

1. In a medium bowl whisk together the flour, baking soda, baking powder and salt; set aside.

2. In the bowl of a stand mixer with the flat beater attached, cream the butter and granulated sugar at medium speed until light and fluffy, about 3 minutes. Scrape down the sides of the bowl with a rubber spatula as needed. Add the eggs, one at a time, beating until each is incorporated. Add the vanilla and sour cream and beat at low speed until combined.

3. Add the dry ingredients and beat at low speed until just combined, scraping down the bowl as needed. Dough will be a bit “sticky”. Divide dough into two sections. Flatten into rectangles about 1½ inches thick, then wrap with plastic wrap. Chill in the refrigerator overnight or at least two hours until firm.

4. Preheat the oven to 425 degrees F. Line large baking sheets with parchment paper; set aside.

5. Flour the countertop and the top of the dough. With a rolling pin, roll the dough out to ¼-inch thickness. Using a 2 1/2-inch round cookie cutter, cut out circles and transfer to a baking sheet. Bake for 7 minutes, until pale golden. Immediately transfer cookies to a wire rack to cool. Cook cookies completely before frosting.

6. To make the frosting, in the bowl of a stand mixer fitted with the paddle attachment, cream together the butter and vanilla. Slowly beat in the powdered sugar and the pinch of salt. Once smooth and creamy, add in heavy cream, 1 tablespoon at a time, then beat at medium-high speed for a minute or two until light and fluffy. If desired, add food coloring and beat until combined.

7. Once cookies have cooled completely, frost and add sprinkles. Allow frosting to set, then store in an air-tight container. Let cookies sit for several hours before serving to allow the flavors to develop.

Suzi

Enter your email address to follow this blog and receive notifications of new posts by email.